Thanks for visiting my blog!

If you build PhoneGap apps and test with the browser, moving to phones sometimes causes a boatload of problems. Because there isn’t a great debugging story, being able to see the console window would be of great help.
My particular problem was that my JavaScript and CSS links weren’t cased correctly. And it seems that the Android implementation is case sensitive (like most Linux implementations) but I couldn’t even see what was wrong. Unfortunately the PhoneGap Build tools let’s you use the console and interrogate the DOM but console log messages are lost. So I simply dropped down to the Android SDK.
I don’t use the Android SDK for development of my PhoneGap apps. I have it installed because I did some early investigation into Android back about two years ago and it was still there. One great thing to say about Eclipse and the Android SDK is that they are simply file-based so when I pave, it still works (still on that drive taking up space). For me this was a lucky break as I needed it to access the console. So how does it work?
Assuming you have the Android SDK, Eclipse and the JDK installed installed on Windows, there are a couple of steps (I think this is pretty similar on a Mac but I don’t know):
Launching the Emulator
First you need to create an emulator (or two). You can do this by locating the Android SDK (mine is under my Eclipse directory) and launching “AVD Manager”:
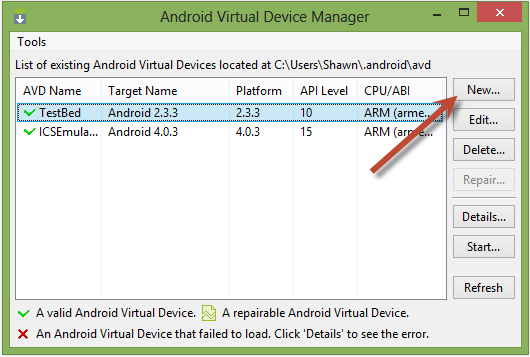
This app will show you the list of existing emulator images you have and let’s you create a new on (likely on this first launch). Hit the “New…” button and you can select the options:
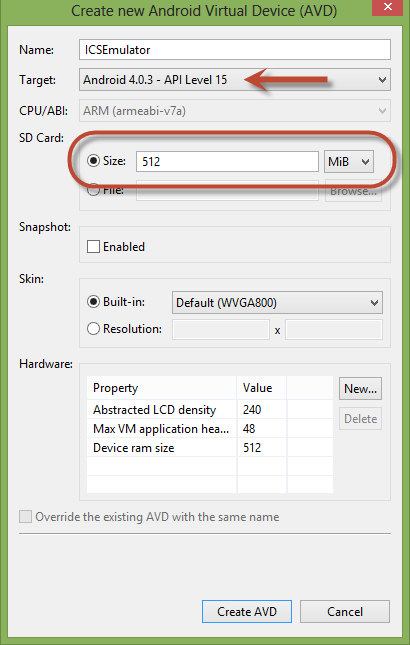
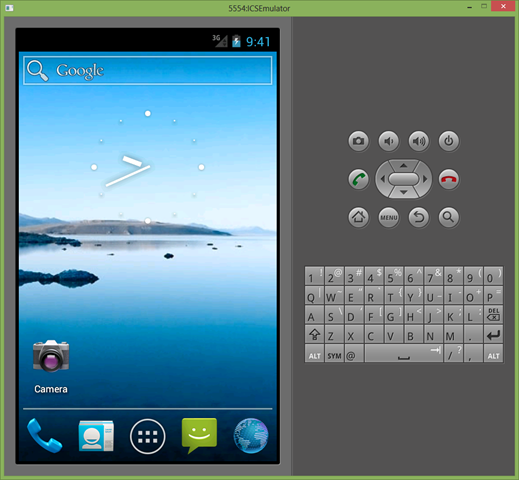
You must name the AVD and pick the target (e.g. the version of the OS to use). Since you want to install your app, you *must* include a SD Card option. I just make it a 512MB size but you can choose your size. I leave everything else alone and click “Create AVD”. Once created (it will give you a summary), you can just click on the AVD and click “Start” (it may take quite a while to launch it the first time):
Installing the App
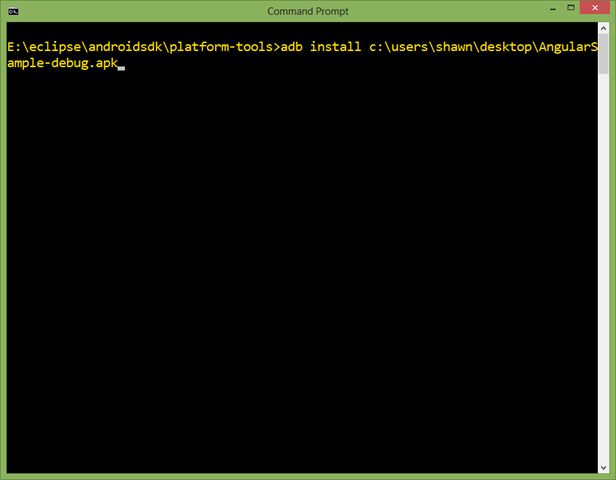
The trick is getting your .apk onto the SD card so you can install it (you could also use the browser to download it if you’re working with PhoneGap build or similar). For me, I just open up a console window and go to the AndroidSDK/Platform_Tools directory and use the “adb install {Path to .apk}” command like so to install your .apk:
This will install it on the emulator (it will be in the list of apps but not on the home screen). If you need to reinstall the app, just add the “-r” flag to the “adb install –r {path to .apk}”.
Viewing the Console
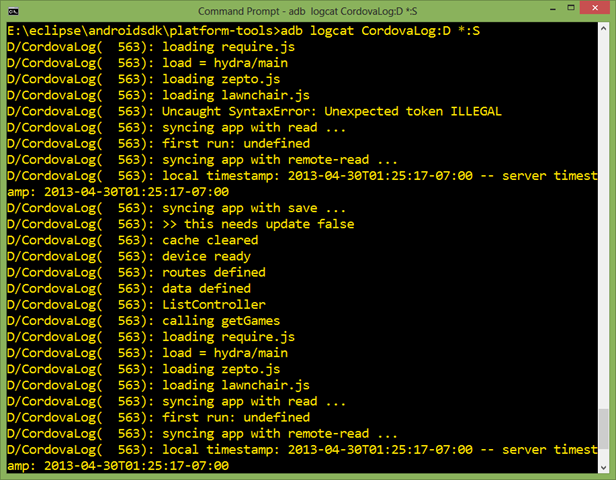
Finally, let’s get the console running. While you’re in the command-line, you can use another ‘adb’ command to show the console. The “adb logcat” command is what you want, but launching that as is shows the console for all apps (and the OS) so it is quite noisy. Instead include a filter for PhoneGap (e.g. Cordova) like so:
The “adb logcat CordovaLog:D *:S” filtering will show you only CordovaLog items (the “D” indicates Debug level or above) and the “*:S” indicates to filter out all others. So when you launch your app, the console will show the output from the JavaScript console (which PhoneGap redirects to the Android log as shown).
Hope this helps, it does me!

